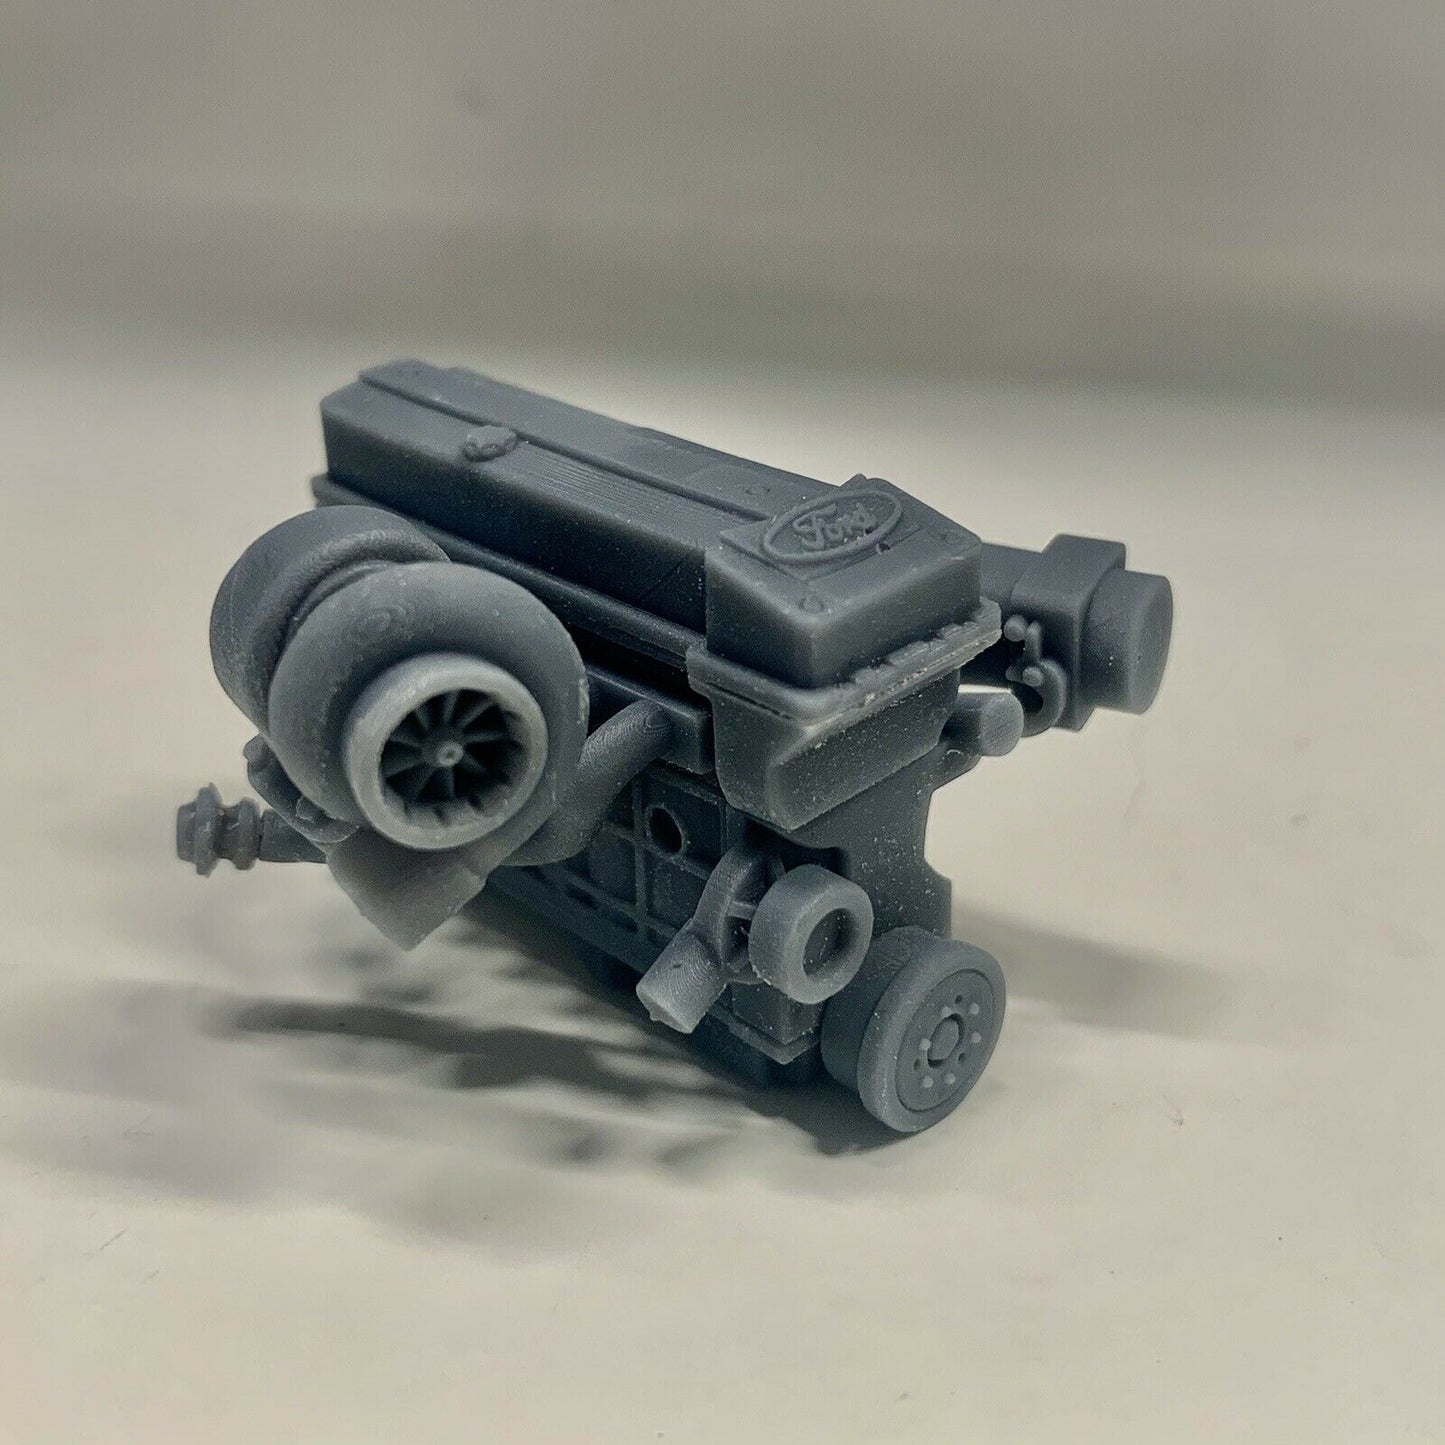
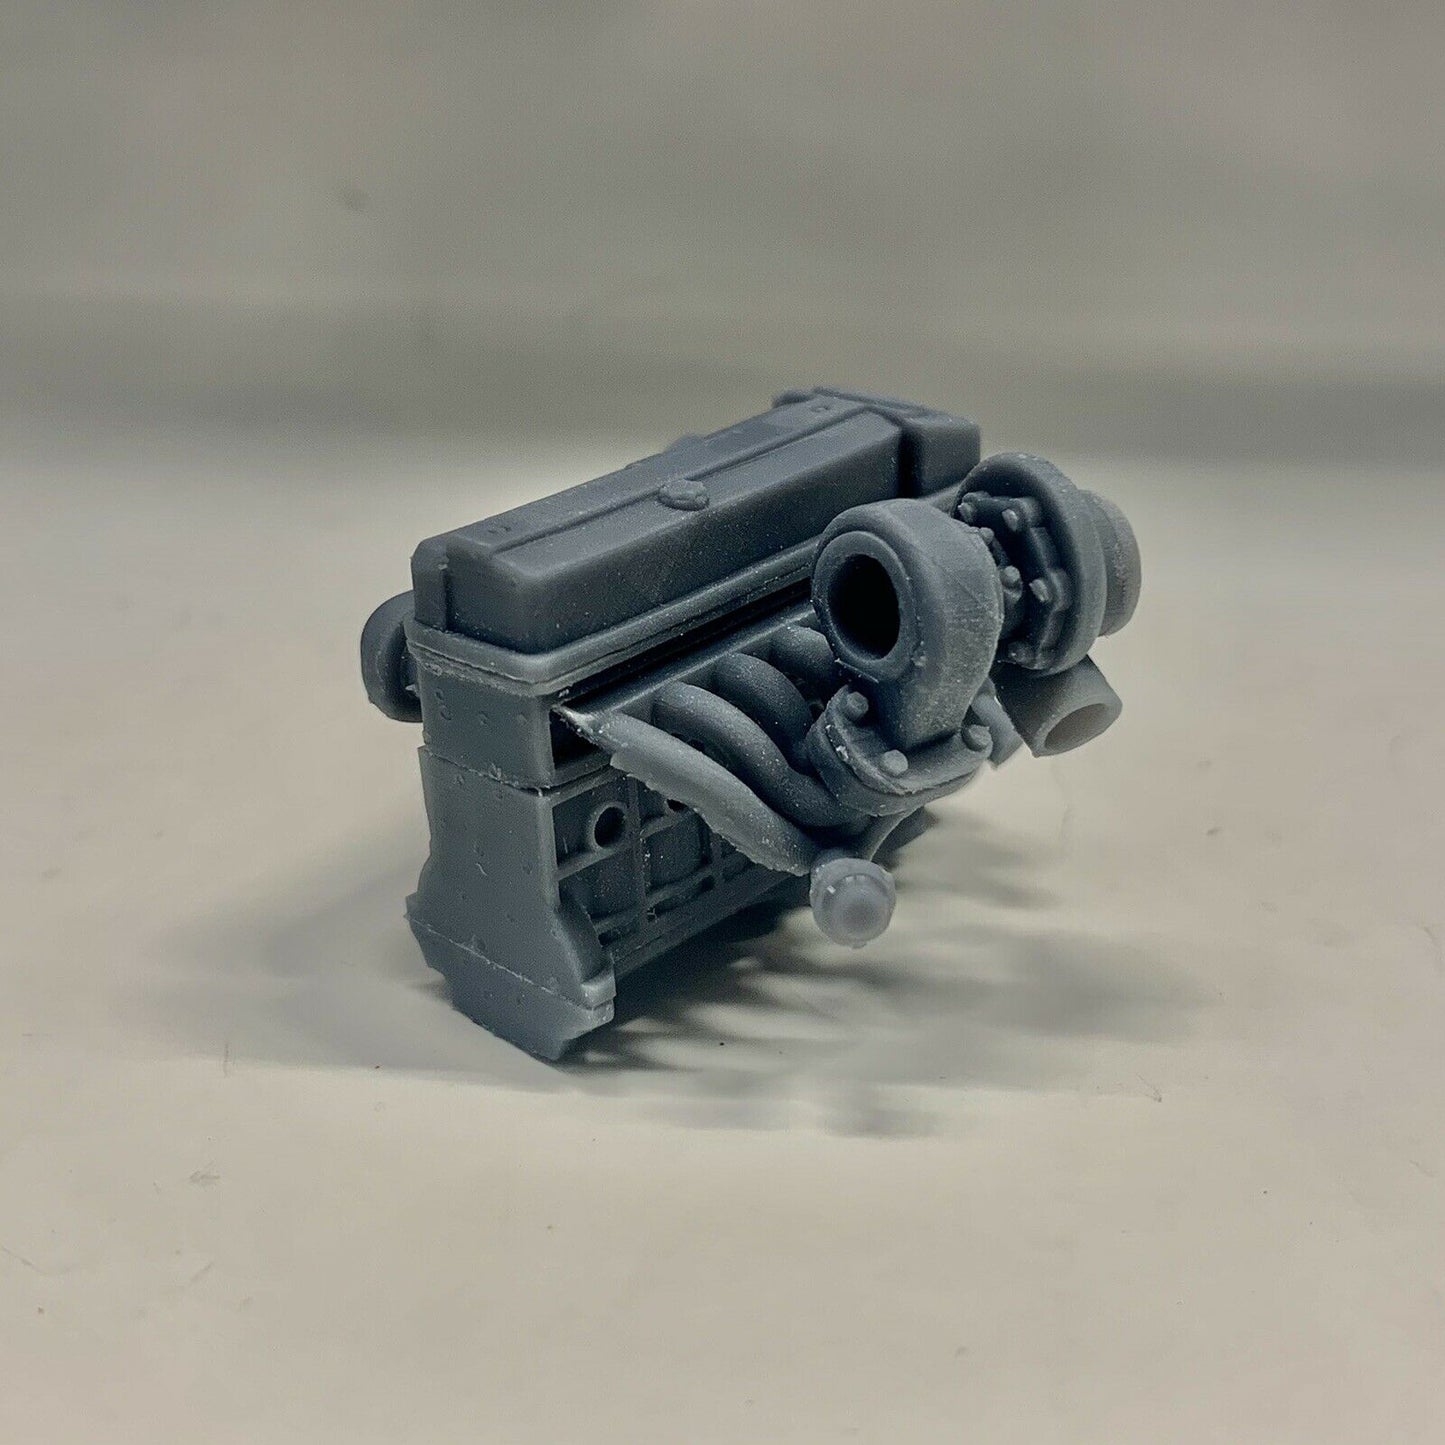
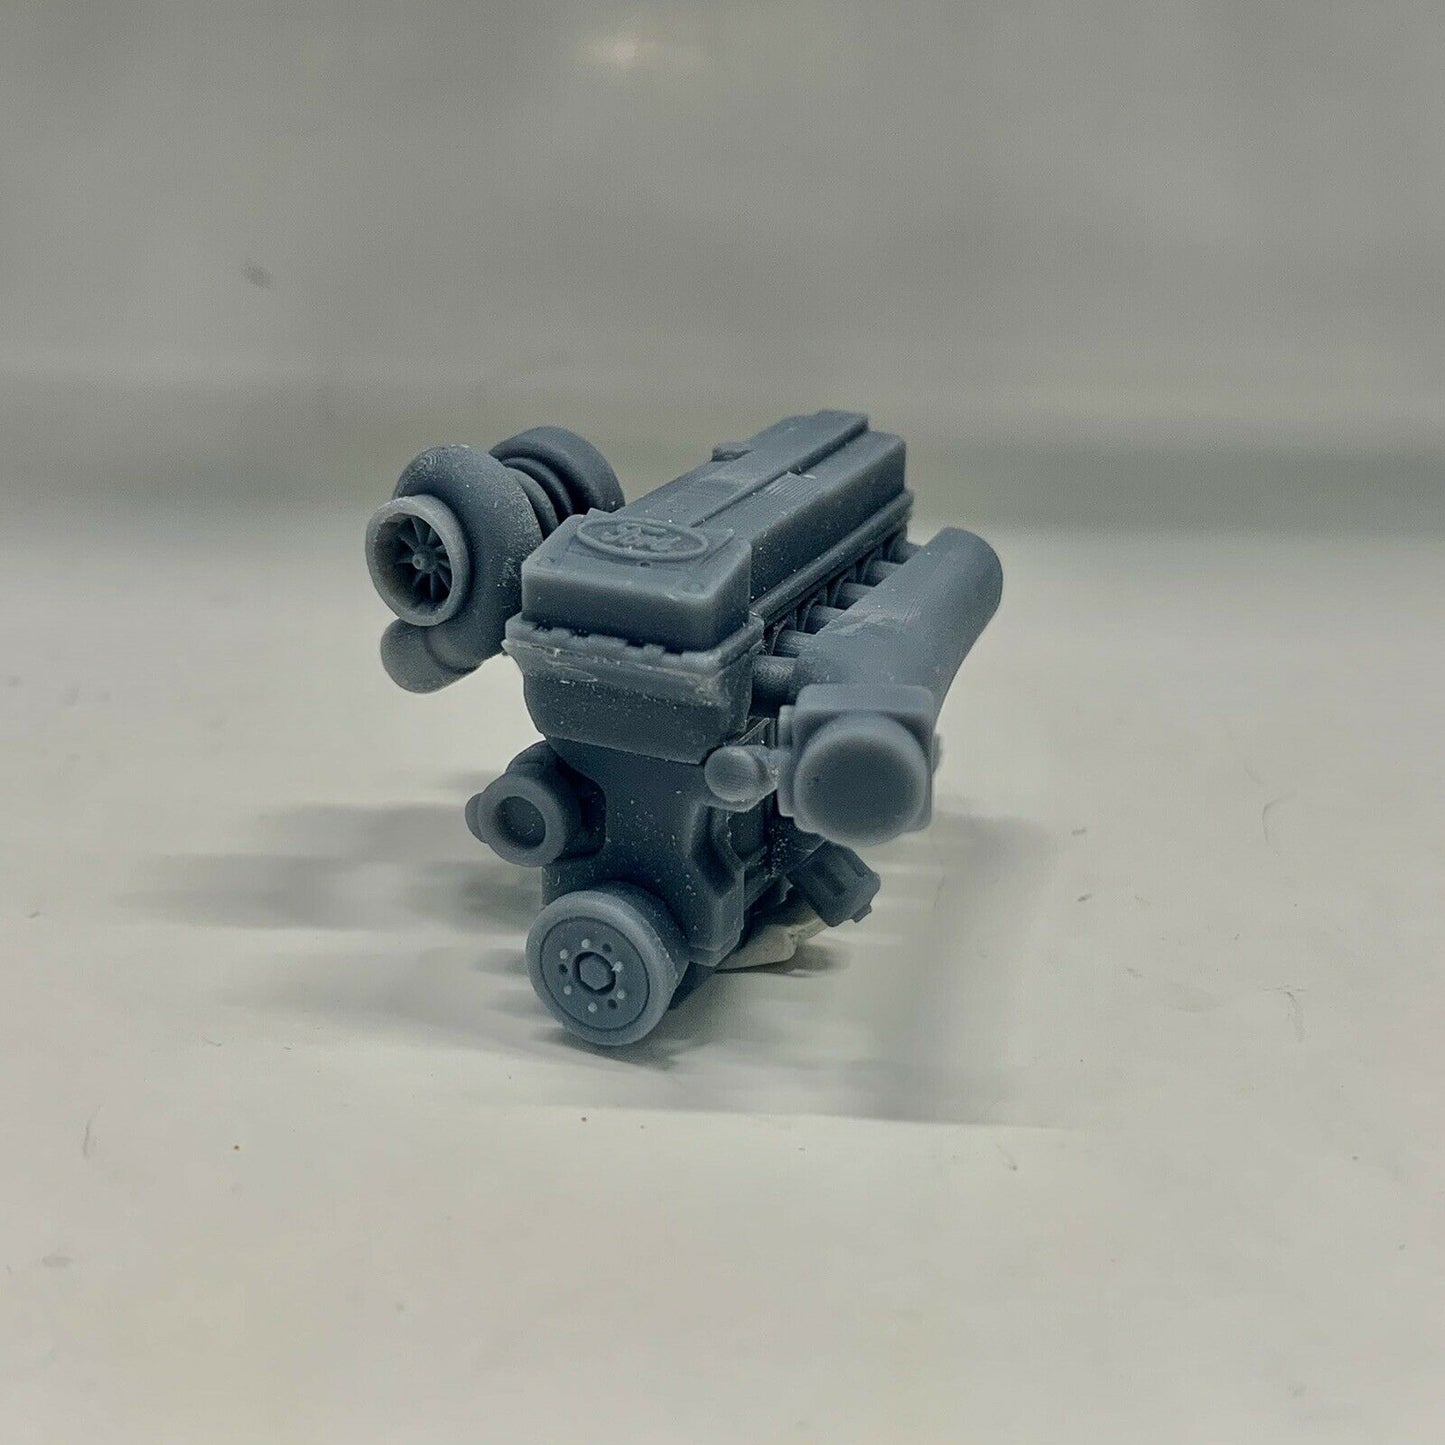
Ford Barra Turbo Engine Swap Inline 6 Engine 1/25
Ford Barra Turbo Engine Swap Inline 6 Engine 1/25
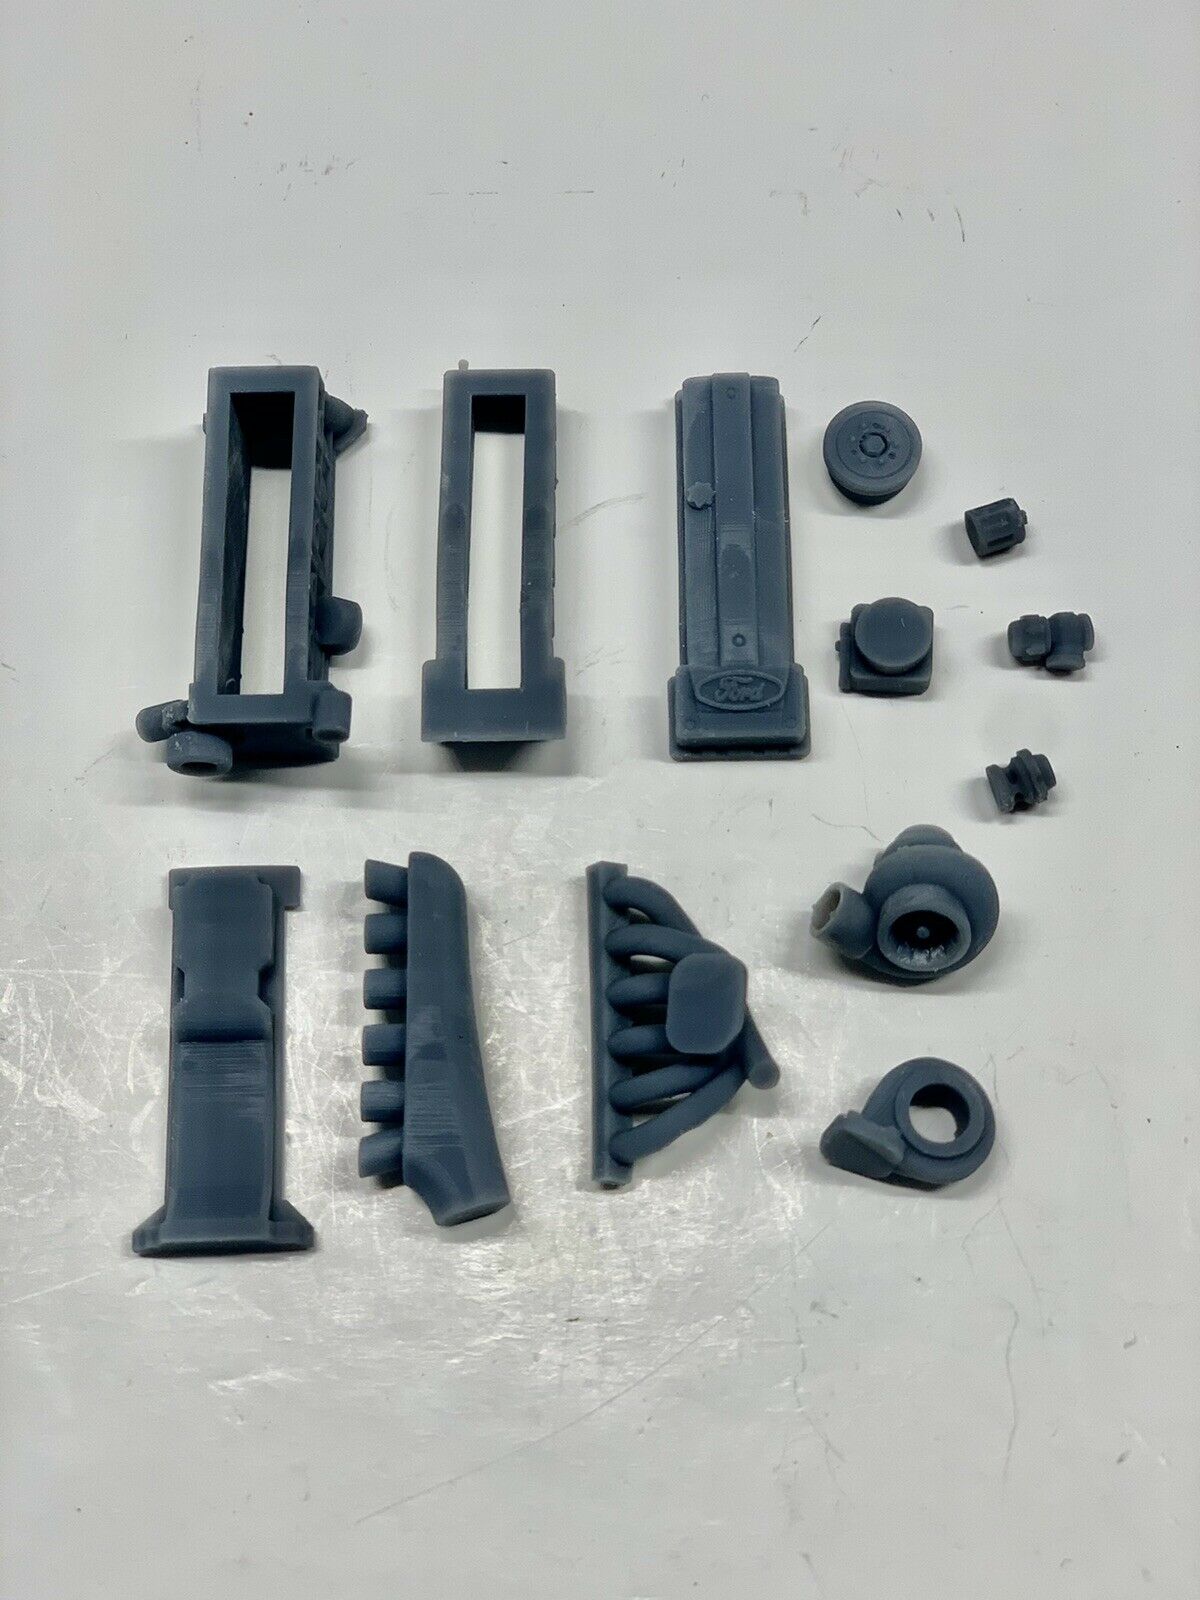
13 parts included.
Although printed in 1/25 scale, it fits fine in 1/24 kits.
If you are not familiar with resin, please research before purchasing. These are not for beginners. As with all resin, this will need some work like sanding smooth, cleaning flash, evening out surfaces, filling pinholes, reshaping, and/or fabricating parts. With the heat that occurs during shipping, some parts may slightly warp. Be prepared to reshape using the hot/cold water method. Resin color may vary from pictures. Color may not match all parts. Assembly instructions are not included. Please use pictures for reference.
Earn [points_amount] when you buy this item.
Regular price
$20.00
Regular price
$0.00
Sale price
$20.00
Unit price
per
Shipping calculated at checkout.
Couldn't load pickup availability
Additional details
Additional details
- Parts are 3d printed in resin
- Some parts may come attached to the support tree
- Sprue cutters are recommended to detach parts
- Some pieces are delicate so take your time
- Any brand CA or super glue is recommended
- There are no assembly instructions. Please use the pictures for guidance.